Stills Export
You can export stills in the following ways:
- Export a Single Frame: For more information, go to Export a Single Frame.
- Export Multiple Frames: For more information, go to Export Multiple Frames
- Export Stills from Markers: For more information, go to Export Stills from Markers.
Export a Single Frame
NOTE: A.D.D. applies temporal denoise to DRAGON clips only.
To export single frames, follow the instructions below:
- Go to the Stills workspace.
- Load an R3D file into the Viewer.
- Navigate to the frame that you want in the Scrub Bar.
- Click one of the following:
 (Still Snapshot): Export the current frame with current snapshot settings.
 (R3D Snapshot): Export the current frame as a single frame RAW R3D file.
 (A.D.D.): Export the current frame with Advanced Dragon Debayer.
Export Multiple Frames
NOTE: You cannot save, import, or export a export presets from the Stills Export panel.
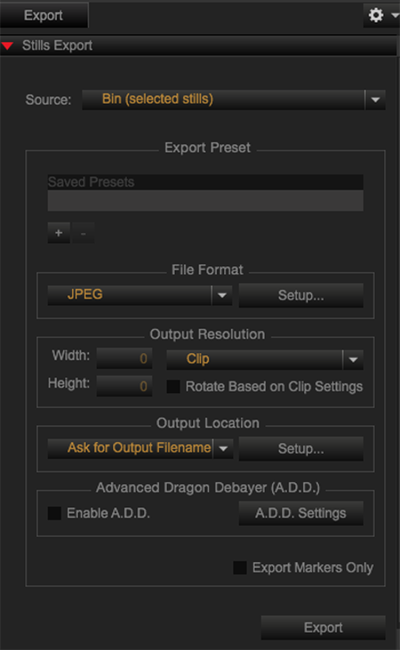
To export a Bin, a project, selected stills, or all stills, follow the instructions below:
- Go to the Stills workspace.
- Load an R3D file into the Viewer.
- Navigate to the frame that you want in the Scrub Bar.
- Go to the Export workroom > Export tab > Stills Export.
- Select one of the following:
- Source: Select Project, Bin (all stills), Bin (selected stills), or Still in Viewer.
- Export Preset: Select or create an Export preset. For more information, go to Export with Presets.
- File Format: Select a file format. For more info, go to Export File Formats.
- Output Resolution: Select the outpout resolution for the clip.
- Output Location: Select the filename and location.
- A.D.D.: Select A.D.D. and settings. For more info, go to A.D.D..
- Export Markers Only: Select to export all markers in the bin. For more information, go to Export Stills from Markers.
- Click Export.

Figure: Stills Export
Export Stills from Markers
- Load an R3D into the Viewer.
- Navigate to the frame that you want in the Scrub Bar.
- Click one of the following:
 (Set Marker) in the Control bar
 (+) in the Mark Thumbnails drop-down group
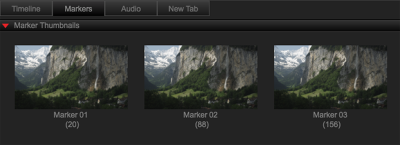
Markers appear in the Markers tab in the bottom panel and in the Marker Thumbnails drop-down group.
- Go to the Markers tab in the bottom panel or the Marker Thumbnails drop-down group.

Figure: Marker Thumbnails
- Select the markers that you want to export.
- Perform one of the following:
- Click
 (Still Snapshot) in the Markers tab to export selected markers with current snapshot settings.
 - Click
 (Make Stills from Markers) in the Markers tab to create reference stills for all selected markers in the Stills tab.
- Click
Adjust Snapshot Settings
- Go to the Preferences... menu.
- Mac: Go to REDCINE-X PRO > Preferences... in the menu bar.
- Windows: Go to Edit > Preferences... in the menu bar.
- Select Snapshot to make adjustments to Snapshot button export settings.
- Click OK.